.avif)
Salesforce is the world’s leading customer relationship management (CRM) platform, used by businesses of all sizes to track leads, manage customer relationships, and drive sales growth. It’s a powerhouse, but like any CRM, it’s only as good as the data you put into it.
That’s why it’s so important to properly integrate Salesforce into your website. By connecting Webflow forms to Salesforce, you ensure that every visitor submission flows directly into your CRM where your marketing and sales teams can take action.
As a Webflow Enterprise Partner, Composite regularly helps clients integrate Salesforce with their Webflow sites. This guide outlines the different approaches you can take, their tradeoffs, and best practices to get it right.
Here’s what we’ll cover:
- What is Salesforce?
- What you need to get started
- Techniques for integration
- Step-by-step: Web-to-Lead setup
- Step-by-step: Zapier workflow example
- Step-by-step: API/Connected App approach
- Best practices for Webflow forms
- Common challenges with integration
What is Salesforce?
Salesforce provides a centralized hub for customer data, with features including:
- Lead & opportunity management – track prospects through every stage of the funnel.
- Workflow automation – trigger emails, assignments, and tasks based on defined rules.
- Reports & dashboards – measure performance across teams in real time.
- Campaign tracking – attribute leads to the right marketing efforts.
- AppExchange – extend Salesforce with thousands of prebuilt integrations.
It acts as the “single source of truth” for customer interactions, making proper integration critical.

What you need to get started
- Webflow site (with forms set up).
- Salesforce org with API access. (Enterprise, Unlimited, Developer, and Performance editions include API access; Professional and Group editions may not without add-ons.)
- Defined goals for your integration:
- What data do you want to capture?
- Which object(s) should it map to (Leads, Contacts, Opportunities)?
- What workflows or campaigns should it trigger once inside Salesforce?
Optional:
- Middleware tools (Zapier, Make, Tray.io).
- Developer resources if you want a custom API integration.
Techniques for Integrating Salesforce into Webflow
There are three main approaches:
1. Web-to-Lead Forms (Direct Embed)
Salesforce can generate HTML Web-to-Lead forms that capture submissions as new Leads in your CRM. Simply paste the embed code into a Webflow Embed block.
Pros: Free, direct, reliable.
Cons: Limited styling, only supports the Lead object, no advanced logic.
2. Third-Party Automation (Zapier, Make, Tray.io)
Webflow forms can push submissions to automation tools, which then send the data into Salesforce.
Pros: Easy setup, visual mapping, supports multiple objects and branching workflows.
Cons: Paid tools, task limits, dependency on third-party uptime.
3. Custom API Integration
For complete control, build a server-side integration using the Salesforce REST API. You’ll create a Connected App in Salesforce for authentication, then send form data securely.
Pros: Supports any object, full flexibility, avoids third-party costs.
Cons: Requires developer time and ongoing maintenance; observe API call limits.

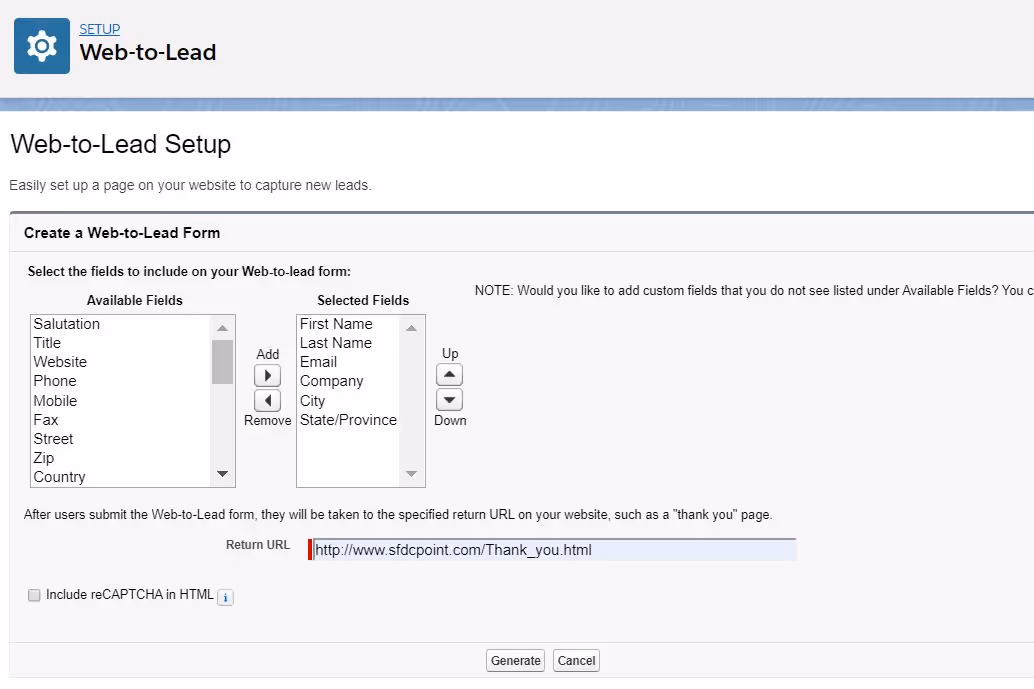
Step-by-Step: Web-to-Lead Setup
- In Salesforce
- Go to Setup.
- Search for Web-to-Lead.
- Click Create Web-to-Lead Form.
- Select the fields you want included (e.g., First Name, Email, Company).
- Define the return URL (thank-you page on your Webflow site).
- Generate HTML code.
- In Webflow
- Add an Embed element where you want the form.
- Paste the HTML code.
- Use custom CSS to style the form so it matches your site.
- Test the form
- Publish your Webflow site.
- Submit the form.
- Check Salesforce → Leads to confirm the data arrived.
Step-by-Step: Zapier Workflow Example
- Set up the trigger
- In Zapier, create a new Zap.
- Choose Webflow → “Form Submission” as the trigger.
- Connect your Webflow account and select the site/form.
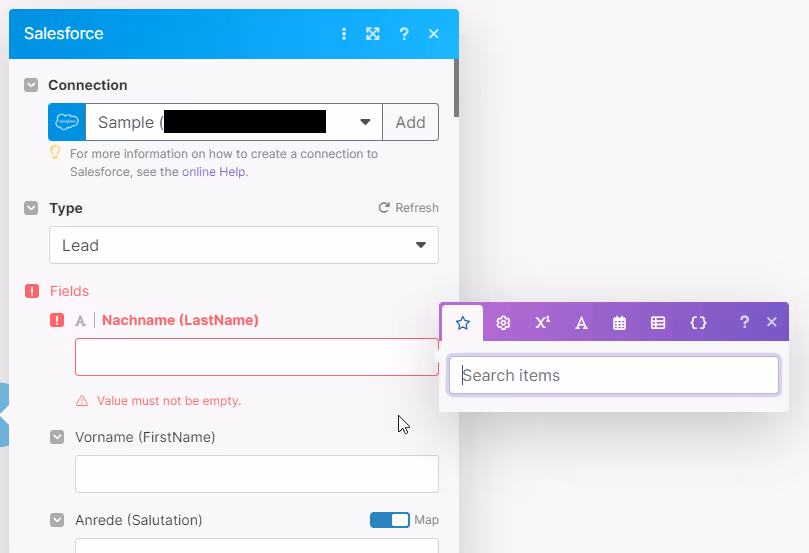
- Set up the action
- Add Salesforce as the action app.
- Choose “Create Record” and select the object (Lead, Contact, etc.).
- Map Webflow fields to Salesforce fields (First Name, Email, etc.).
- Test & publish
- Submit a Webflow form.
- Confirm the record appears correctly in Salesforce.
- Turn on the Zap for live use.
Step-by-Step: Custom API Integration
- In Salesforce
- Go to Setup → Apps → App Manager.
- Create a New Connected App.
- Enable OAuth and add a callback URL.
- Capture your Consumer Key and Secret.
- On your server
- Build an endpoint that receives Webflow form submissions (via Webhooks or a proxy).
- Authenticate with Salesforce using the OAuth flow.
- POST the form data to Salesforce’s REST API (e.g., /services/data/vXX.X/sobjects/Lead/).
- In Webflow
- Point your forms to your server endpoint.
- Test thoroughly
- Submit forms.
- Confirm data appears in Salesforce with the correct mapping.
Best Practices for Webflow Forms
- Map fields carefully – avoid mismatches or incomplete data.
- Use hidden fields for UTMs – capture attribution data for campaign reporting.
- Test on staging and production – confirm all data flows before launch.
- Match branding – style embedded forms with CSS for visual consistency.
- Monitor API usage – watch Salesforce’s daily API call limits if using middleware or custom integrations.
Common Challenges
- Styling Web-to-Lead – the generated forms are plain HTML; CSS work is needed.
- Data mapping errors – incorrect field mapping can block or misplace data.
- Duplicate leads – without dedupe rules, repeat submissions may create multiple records.
- API call limits – exceeding daily API quotas halts integrations until reset.
- Middleware errors – Zapier/Make tasks can silently fail if not monitored.
Conclusion
Integrating Salesforce with Webflow unlocks a seamless flow of lead data from your website into your CRM. Whether you choose Web-to-Lead forms, a no-code workflow, or a custom API build, the goal is the same: accurate, actionable data that empowers your sales and marketing teams.
At Composite, we help businesses implement Salesforce integrations that scale to ensure your Webflow site isn’t just a storefront, but a direct pipeline to your CRM.
Thinking about integrating Salesforce with Webflow? Let’s talk.