Clearbit is a powerful data enrichment and marketing intelligence platform that helps companies identify website visitors, segment audiences, and personalize their experiences. It connects real-time firmographic data, like company size, industry, and role, to your marketing workflows, allowing sales and marketing teams to act on insights immediately.
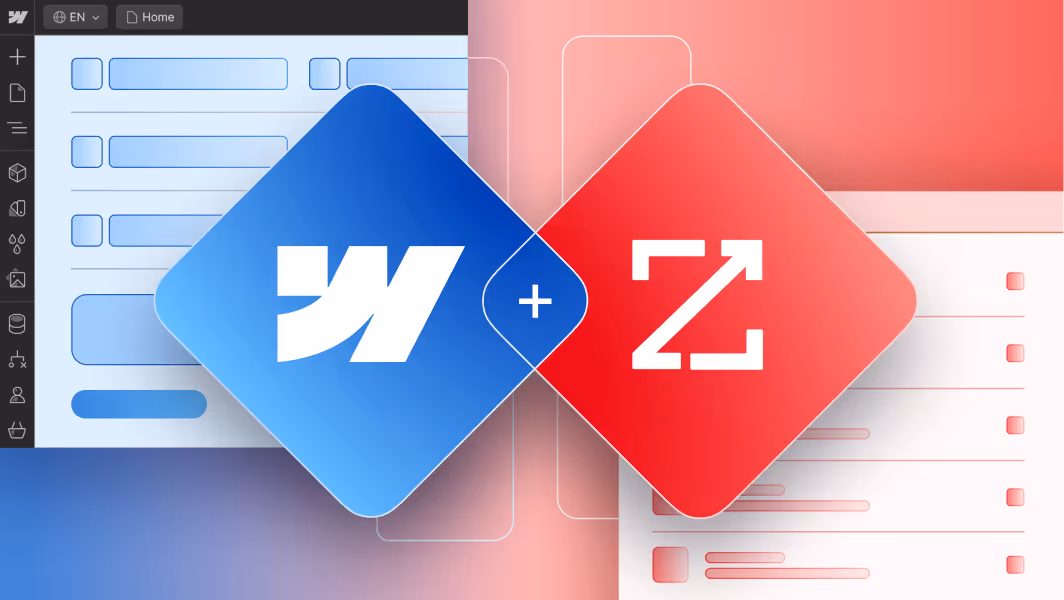
Webflow, on the other hand, gives teams full design flexibility and CMS control to build high-performing, visually rich sites. By integrating Clearbit with Webflow, brands can connect design and data: transforming a static marketing site into a dynamic growth engine that learns and adapts to its visitors.
Unlike some of the other integrations we’ve covered (like HubSpot or Salesforce), Clearbit isn’t available as a native app in the Webflow Marketplace. Instead, you’ll connect it using middleware platforms (like Zapier or Make), JavaScript embeds, or Clearbit’s API.
This guide walks through the main integration methods, their pros and cons, and when to use each, along with best practices for privacy, performance, and personalization.
Here’s what we’ll cover:
- What is Clearbit and why integrate it with Webflow
- What you need to get started
- Techniques for integration
- Step-by-step: Enriching Webflow forms
- Step-by-step: Using Clearbit Reveal for personalization
- Step-by-step: Connecting via API or middleware
- Best practices for Clearbit + Webflow
- Common challenges and troubleshooting
- Conclusion
What Is Clearbit and Why Integrate It with Webflow
Clearbit is a marketing data platform used by B2B brands to understand and engage their audiences more effectively. It pulls verified business and professional data from hundreds of sources to enrich your CRM and marketing stack.
Integrating Clearbit with Webflow allows you to:
- Identify anonymous visitors and map them to company records
- Enrich form submissions automatically with firmographic and demographic data
- Personalize website content based on visitor attributes (e.g., industry, company size)
- Send enriched leads directly to your CRM or email marketing tools
This setup is ideal for B2B, SaaS, and fintech brands that want to enhance lead quality, streamline marketing operations, and create personalized experiences without sacrificing Webflow’s design control.
What You Need to Get Started
Before you begin, make sure you have:
- A Clearbit account (free trial or paid plan with API access)
- A Webflow CMS or Business Site plan (for embedding custom code and scripts)
- Access to Zapier, Make, or another automation tool (optional but recommended)
- Admin access to your CRM or marketing automation platform (e.g., HubSpot, Salesforce, or Marketo)
Optional but helpful:
- Google Tag Manager (GTM) for managing scripts
- A developer or technical marketer for API-based personalization setups
Techniques for Integrating Clearbit with Webflow
There are three main ways to integrate Clearbit with Webflow, depending on your technical setup and goals.
1. Installing Clearbit JavaScript (Recommended for Most Users)
The easiest way to integrate Clearbit with your Webflow site is by installing their JavaScript snippet. This enables Clearbit to identify and track company-level traffic automatically, providing data that can later be used for personalization, enrichment, or analytics.
Implementation Steps:
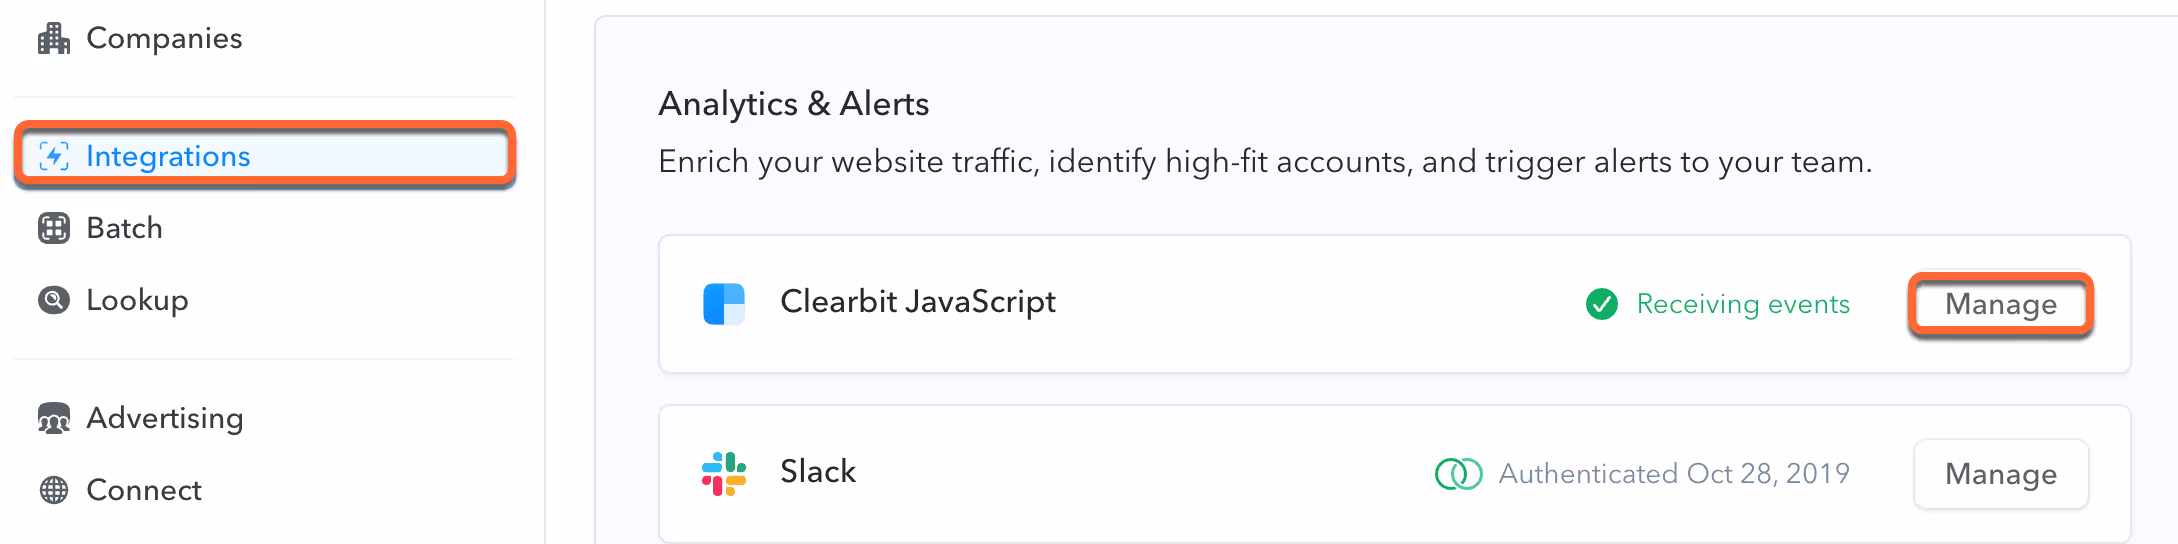
- In your Clearbit account, navigate to Integrations → Clearbit JavaScript (or Settings → Clearbit JavaScript if you don’t see Integrations). Click Manage.
- Click the Copy icon to copy your JavaScript snippet.
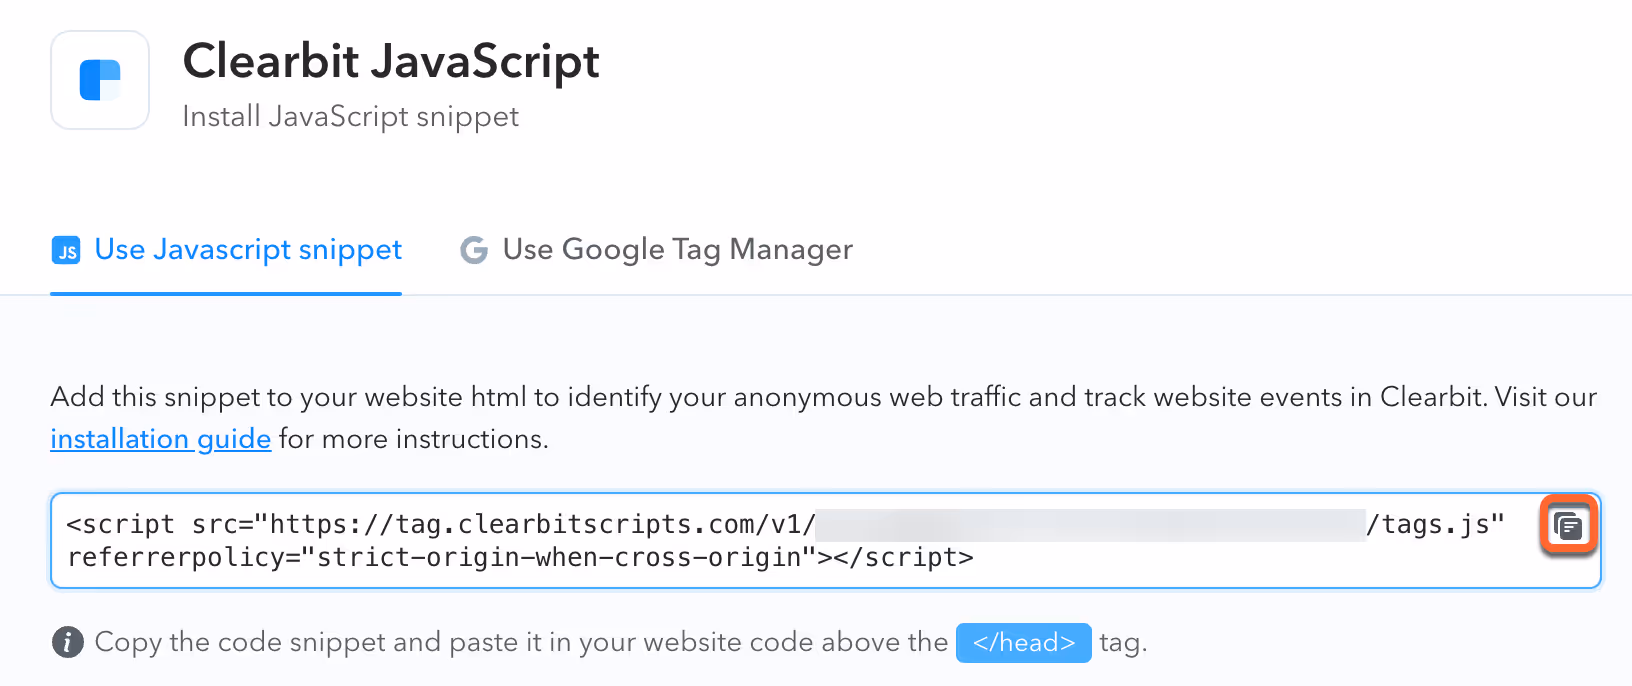
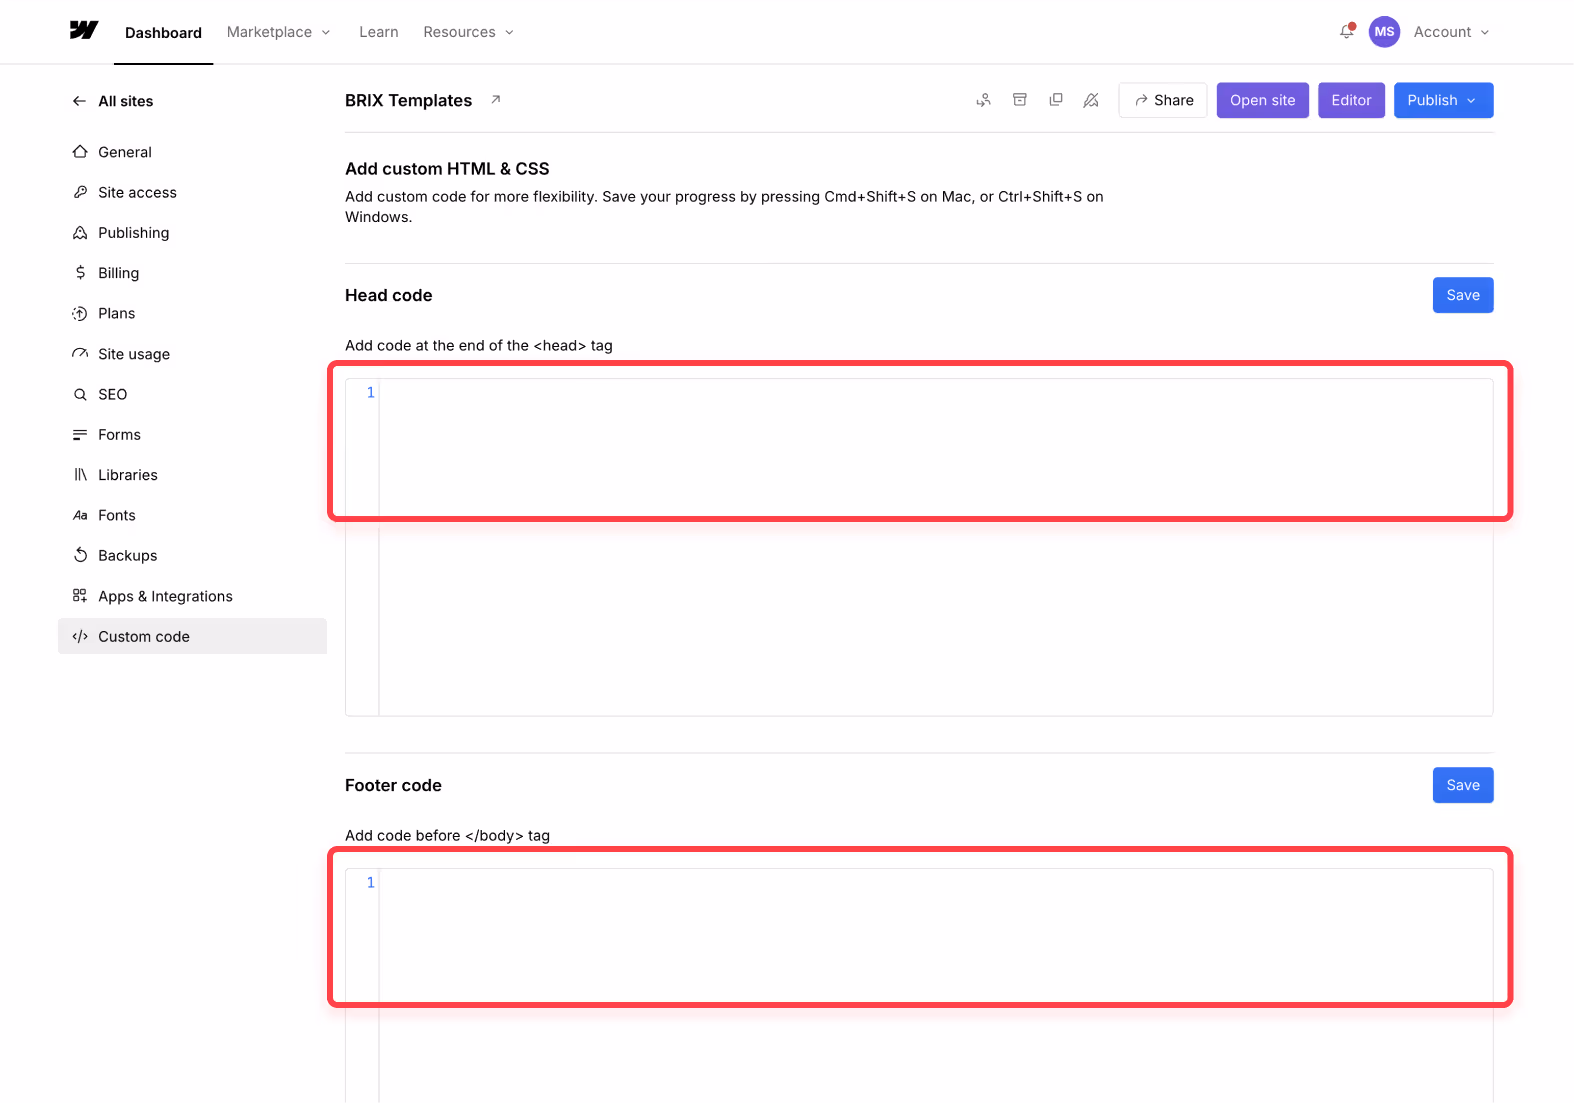
- In Webflow, go to your project’s Settings → Custom Code → Head Code and paste the snippet before the closing </head> tag.
- Clearbit loads synchronously, but its tags are appended asynchronously by default.
- Add your Allowed Referrers in Clearbit:
- Enter your domain (and any subdomains) under the Allowed Referrers section and click Save.
- This prevents unauthorized use of your public API key and ensures tracking only occurs on approved domains.

- Publish your site and test the integration:
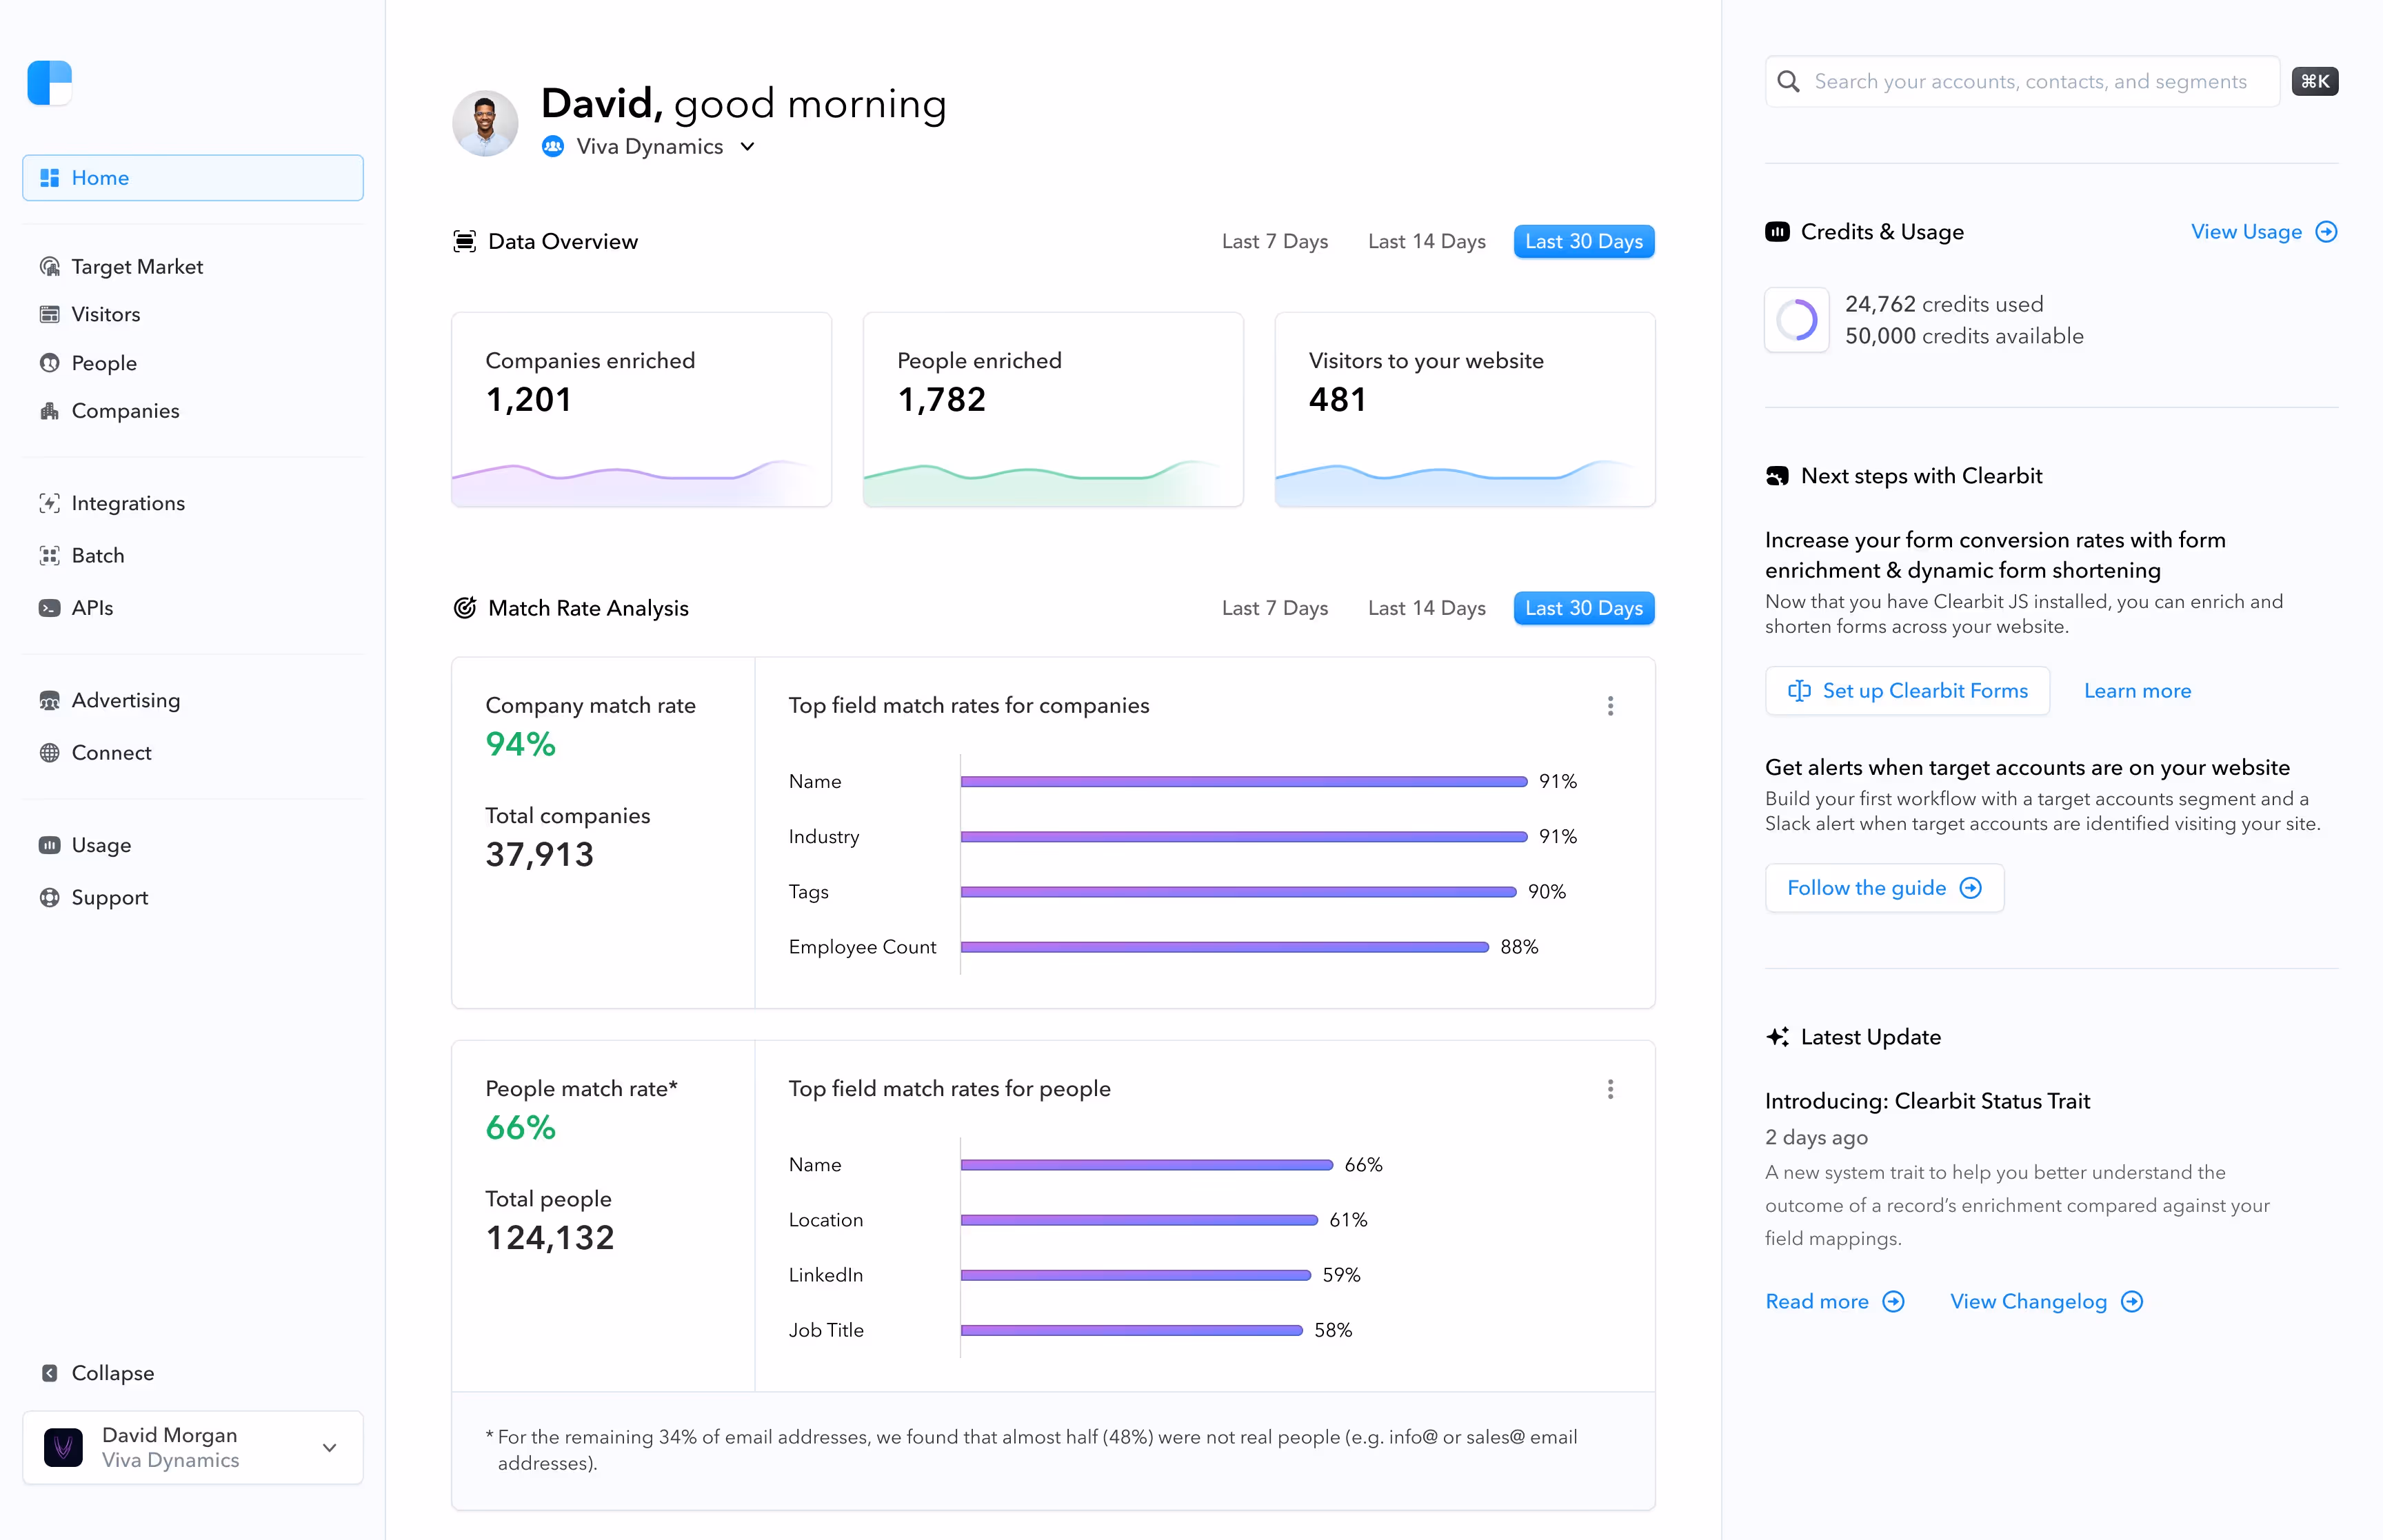
- In your Clearbit account, click Test Integration to verify that data is being received.
- You can also confirm live web traffic under Companies → check for recent visits and activity logs.
Alternative Setup: Install with Google Tag Manager
If you manage tracking through GTM:
- Create a new Custom HTML Tag in your GTM container.
- Paste your Clearbit JavaScript snippet in the tag’s HTML section.
- Set the trigger to All Pages, then save and publish.
Pros:
- Fast, no-code installation directly through Webflow or GTM.
- Automatically tracks company-level web traffic.
- Secure with domain-based referrer restrictions.
Cons:
- Tracks only company-level data unless paired with Identify calls.
- Requires adding Identify or enrichment steps to capture individual user data.
Best for:
Marketing teams who want to see which companies visit their Webflow site and enrich leads later via Clearbit’s API or CRM integrations.
2. Enriching Webflow Forms via Zapier or Identify Calls
To reveal and track individual users (not just companies), Clearbit can connect form submissions to its database using Identify calls or no-code automation.
Implementation Steps:
- In your form setup (Webflow or via middleware like Zapier):
- Capture the user’s email address.
- Pass the email to Clearbit’s Enrichment API or Zapier integration.
- Map returned attributes, like company name, industry, or job title, to your CRM fields.
Optional:
If using HubSpot or Marketo, you can link Identify calls directly to those tools, allowing Clearbit to track individual users post-submission.
Pros:
- Enables full user-level tracking and lead enrichment.
- Works seamlessly with existing CRMs or automation stacks.
Cons:
- Requires API setup or middleware connection.
- Personal data tracking may require additional privacy compliance (GDPR, CCPA).
Best for:
B2B and SaaS teams that want enriched form data automatically sent to their CRM for lead scoring and segmentation.
3A. API Integration (Legacy Accounts Only)
Clearbit’s APIs historically allowed developers to build direct integrations for real-time enrichment, personalization, and lead scoring. However, as of 2024, new Clearbit accounts, both free and paid, no longer include API keys. Only accounts created in 2023 or earlier can access this functionality.
Implementation Steps:
- In your Clearbit account, go to Settings → Keys & Settings.
- Click the Eye icon to view your Secret API Key, or the Copy icon to copy it (Admin access required).
- Use the key within server-side scripts, middleware (like Make or Zapier with webhooks), or a custom Webflow backend function to:
- Enrich new leads with company and contact data
- Match site visitors to known accounts for ABM workflows
- Sync enriched data to your CRM or data warehouse
Pros:
- Full data control and automation for legacy users
- Real-time enrichment and personalized user experiences
Cons:
- Only available to accounts created before 2024
- Requires developer setup and ongoing maintenance
Best for:
Teams with legacy Clearbit accounts or enterprise clients already using Clearbit APIs for enrichment, prospecting, or real-time personalization.
3B. Middleware or JavaScript Integration (For New Accounts)
New Clearbit accounts created in 2024 or later no longer have API key access. Instead, users can integrate Clearbit through the JavaScript snippet or Google Tag Manager to track firmographic data and trigger automations without needing an API key.
Implementation Steps:
- In your Clearbit account, go to Integrations → Clearbit JavaScript (or Settings → Clearbit JavaScript).
- Copy the provided snippet and paste it before the closing </head> tag in your Webflow project settings, or add it as a Custom HTML tag in Google Tag Manager.
- Add your allowed referrers (domains/subdomains) in Clearbit for security.
- Use middleware tools like HubSpot, Segment, or Zapier to trigger automations based on Clearbit’s firmographic data.
Pros:
- Works for all Clearbit users (no API key required)
- Easier to set up and manage through GTM or middleware
- Enables firmographic tracking and basic personalization
Cons:
- Less granular control compared to API-based workflows
- Dependent on Clearbit’s JavaScript tracking accuracy
Best for:
Modern Webflow teams using Clearbit for visitor insights, lead scoring, or ABM automations without developer-heavy setup.
Best Practices for Clearbit + Webflow Integration
- Comply with privacy regulations: Always inform users about data enrichment and tracking practices (GDPR, CCPA).
- Test enrichment accuracy: Validate Clearbit data against CRM entries to maintain clean records.
- Keep personalization modular: Build Webflow sections that can easily change copy or imagery dynamically.
- Use GTM for script management: Simplifies testing and updating scripts without republishing.
- Track performance: Measure conversion lift or engagement metrics post-personalization.
Common Challenges and Troubleshooting
- Zapier delays: Enrichment may take a few seconds to appear in CRM.
- Free email domains: Enrichment often fails for personal addresses like Gmail or Outlook.
- Data gaps: Smaller companies may not appear in Clearbit’s dataset.
- Privacy blockers: Some ad blockers may prevent script loading.
Conclusion
Integrating Clearbit with Webflow gives brands the power to transform static pages into intelligent, data-driven experiences. Whether enriching form submissions or personalizing entire pages, Clearbit bridges the gap between design and decision-making.
From no-code setups with Zapier to full API workflows, Clearbit offers multiple entry points for marketers and developers alike.
At Composite, we help brands connect Webflow with data intelligence tools like Clearbit, ensuring their sites don’t just look great, but think strategically, too.
Thinking about integrating Clearbit with Webflow? Let’s talk.